Making Beautiful Talking Head Videos
tags:: #output/essay on/video
The 20% of Making Beautiful Talking Head Videos
Beautiful images are sticky, they make your viewers stick around.
There are an immense amount of resources on videography. You can spend months and tens of thousands of euros optimizing your studio. But there are some principles that get you far for free or with a small investment. This is the 20% that will get you 80% of the way.
Have great audio
What, weren’t we talking about video?
Why audio first
Audio is more important than video.
People can tolerate crappy video, but if you’re illegible they’ll click away before you can say “hey guys please subscribe.”
- You should be understandable
- You shouldn’t have distracting background noise
- You shouldn’t have much echo
Microphone doesn’t matter
You don’t need a fancy microphone.
What matters is how close you can put the microphone to your mouth, as that makes the background relatively quiet.
This is why you want a separate external microphone.
Types of microphone setups
Modern laptop’s microphone arrays (Mac’s “studio microphones” in particular) can be very good actually. Test this by recording something, going to a different room, and listening with your headphones. If that sounds great, just record with the laptop in front of you.
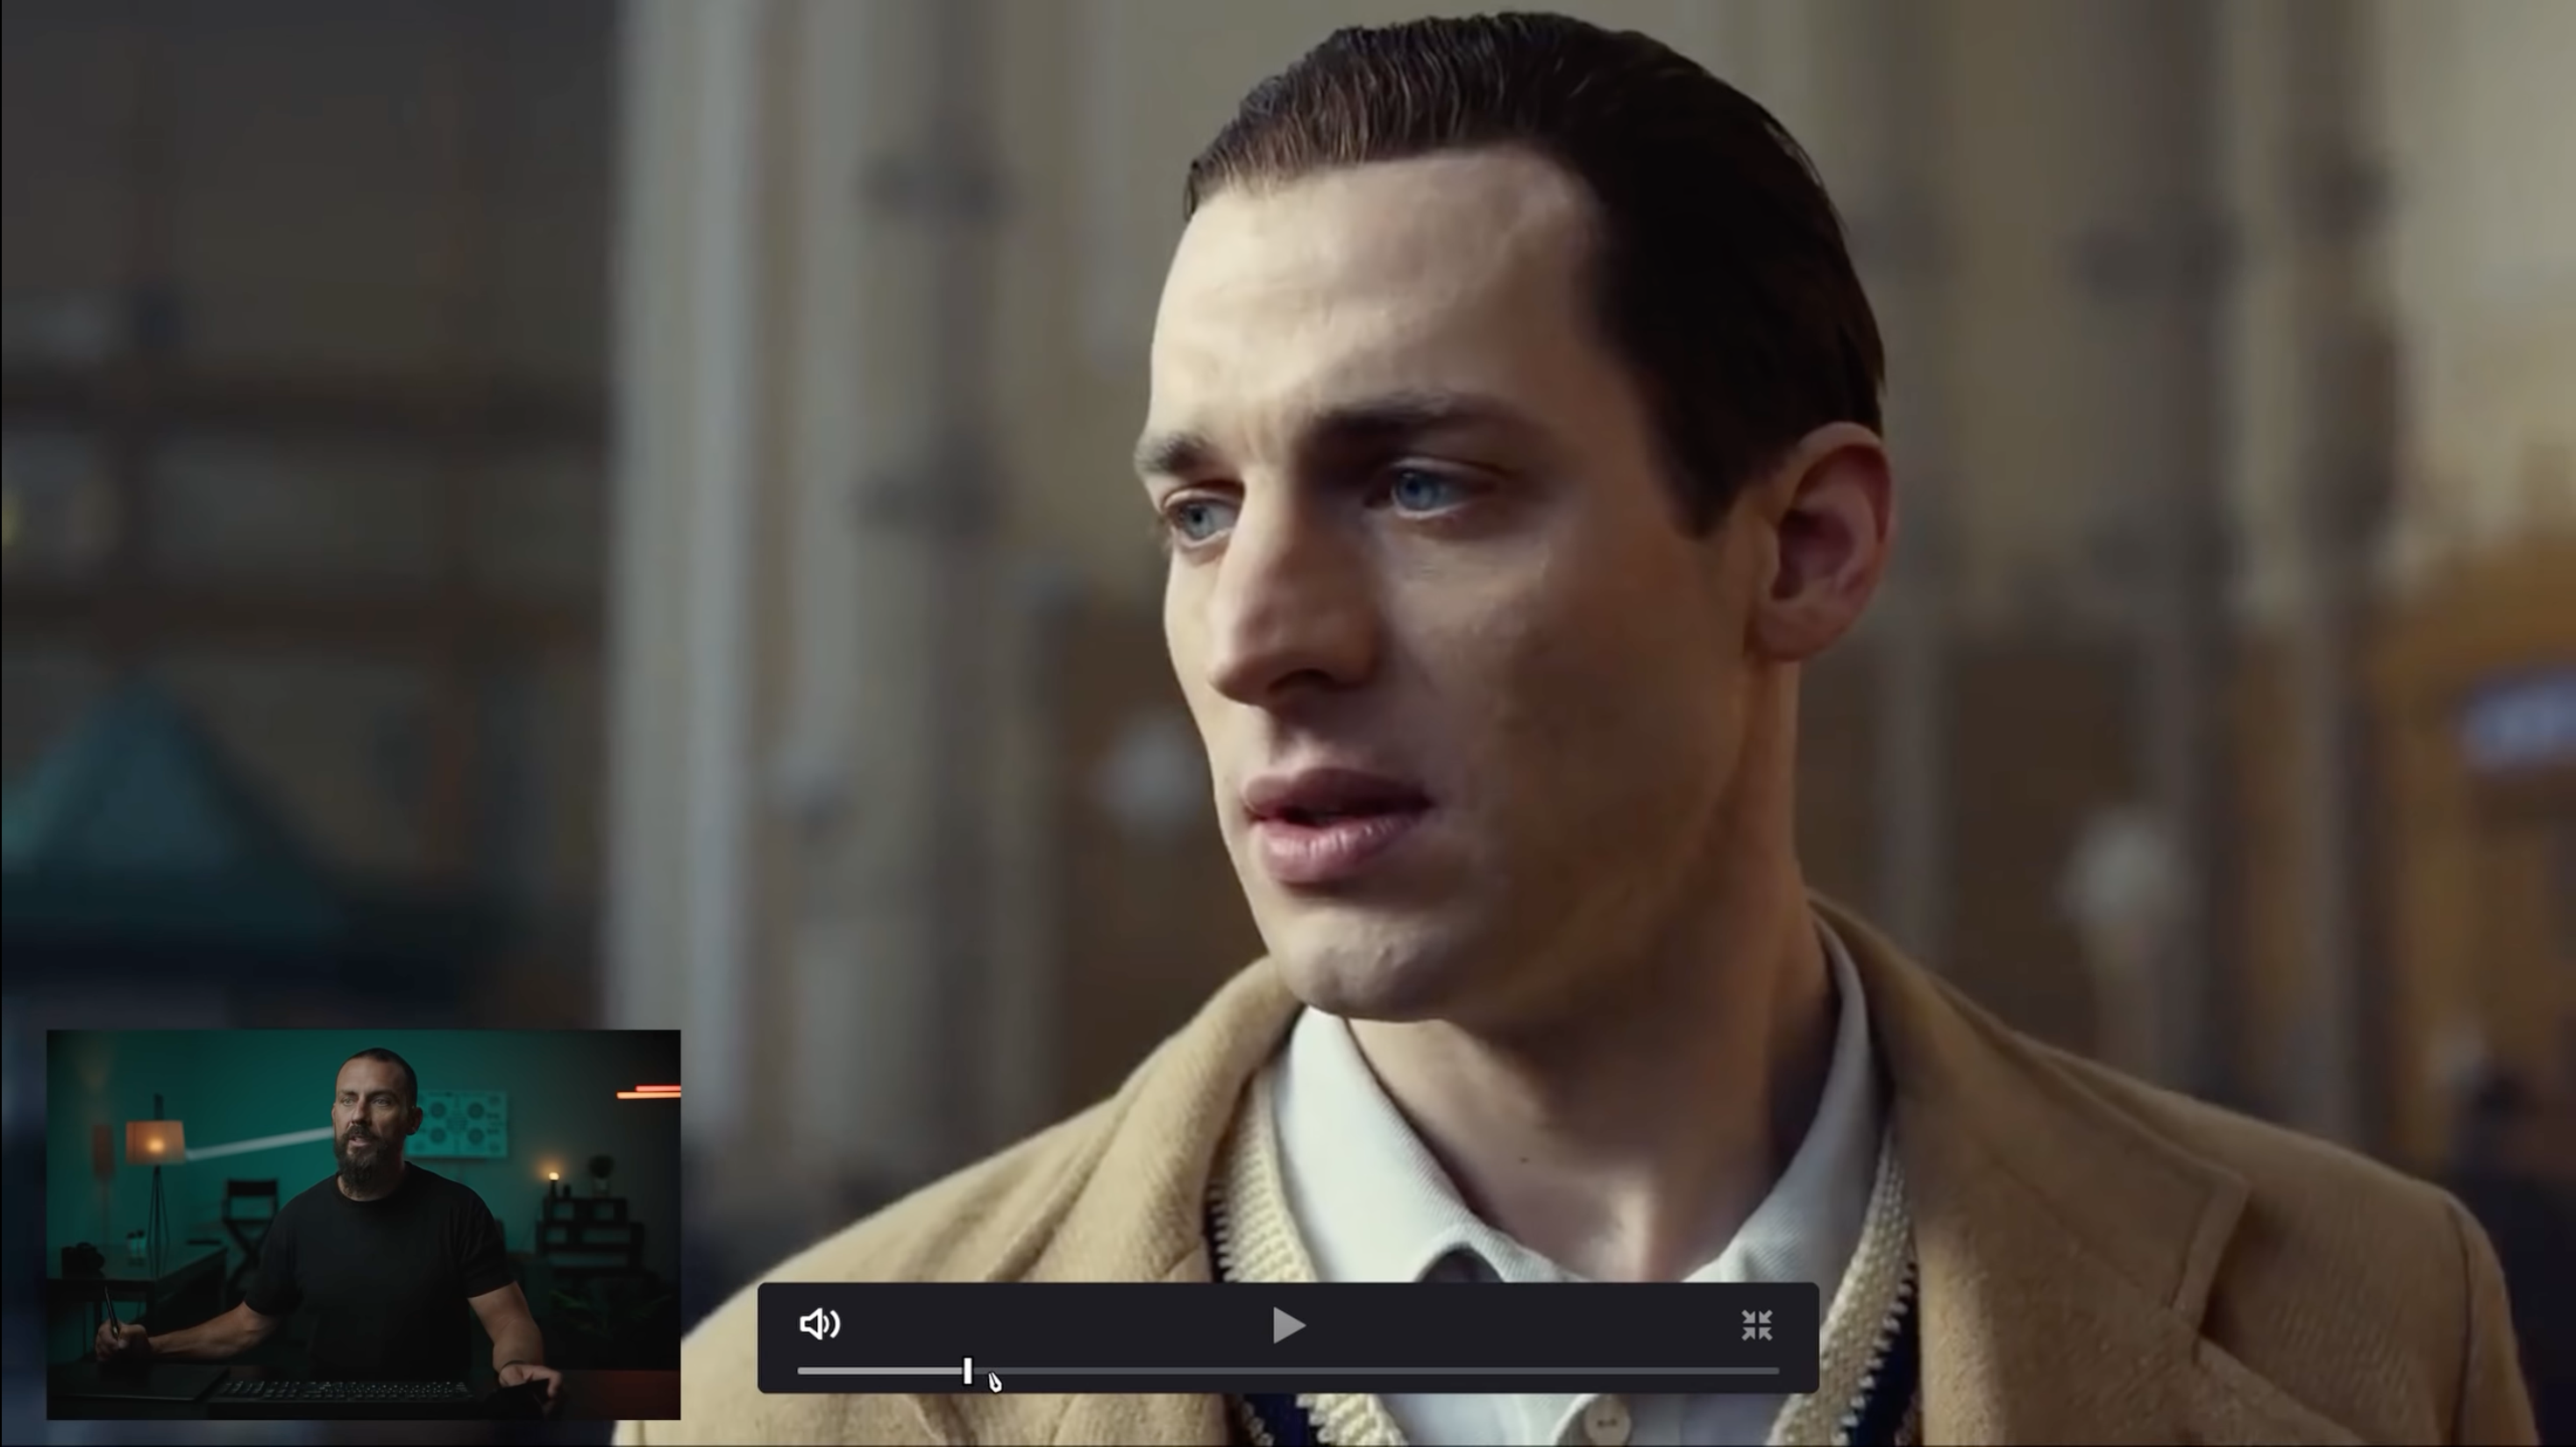
The most common setup for pros is a boom mic right outside of the frame, pointed at the upper chest:
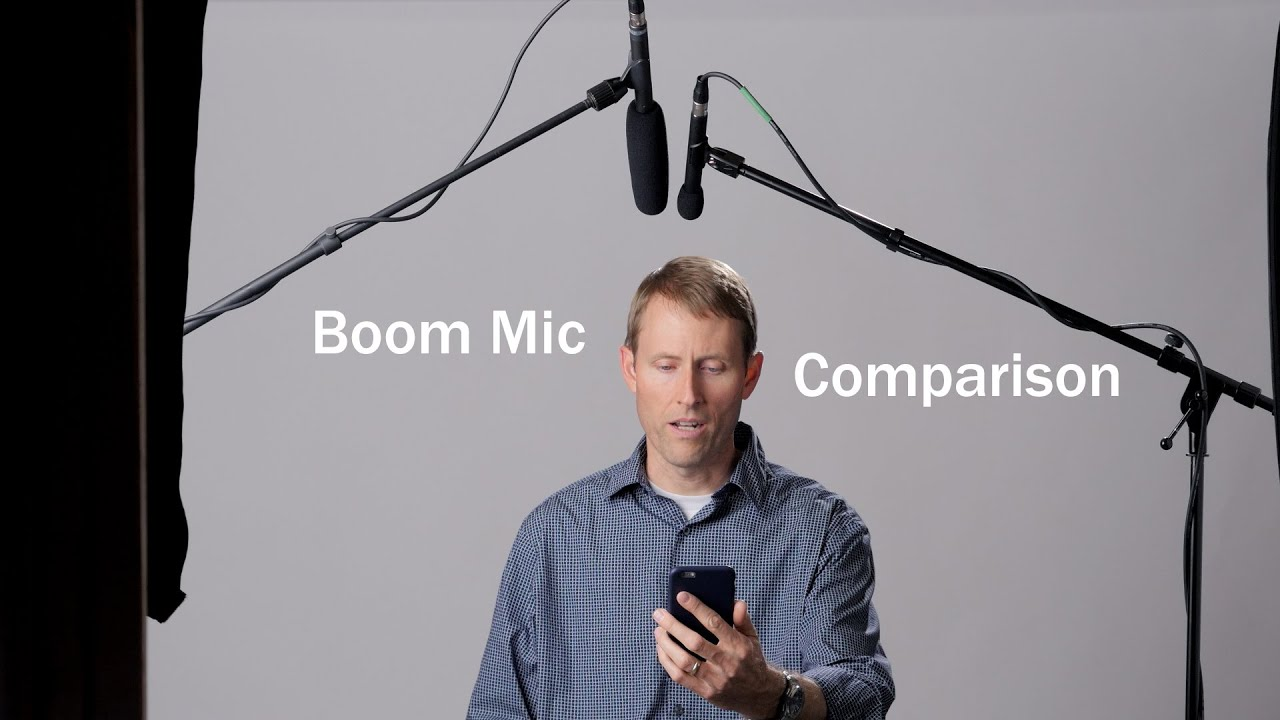
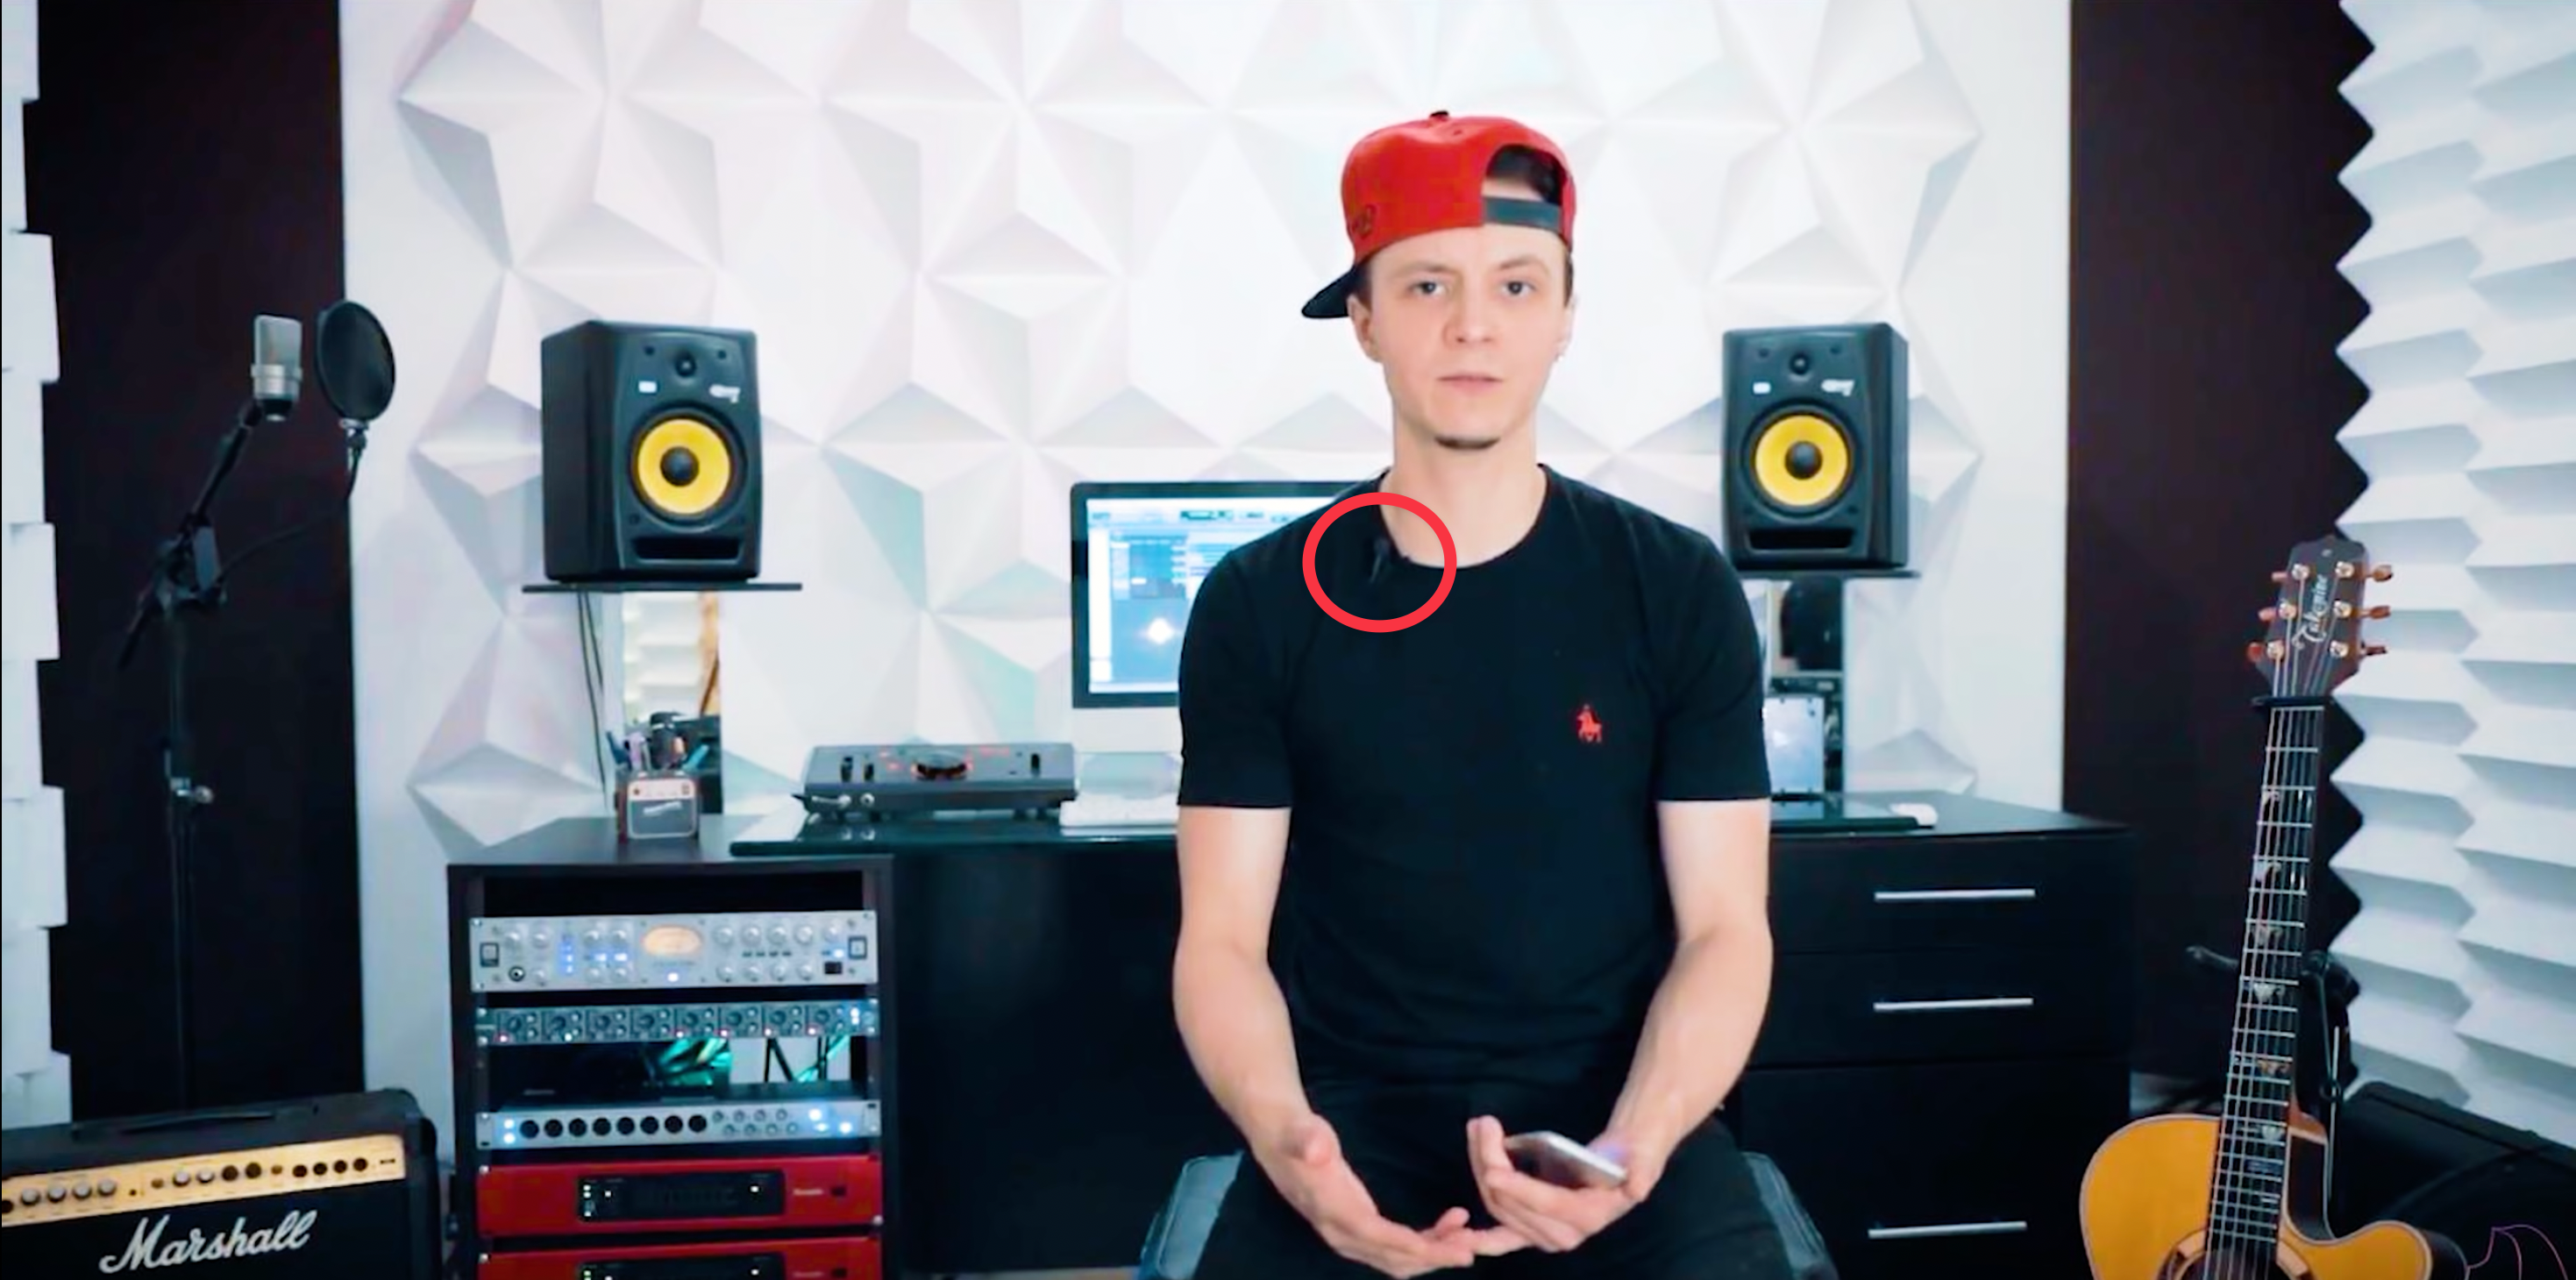
Boom mics are expensive but a 30 euro wired lavalier microphone gets you close enough. Just clip it to your chest and let it do the rest.
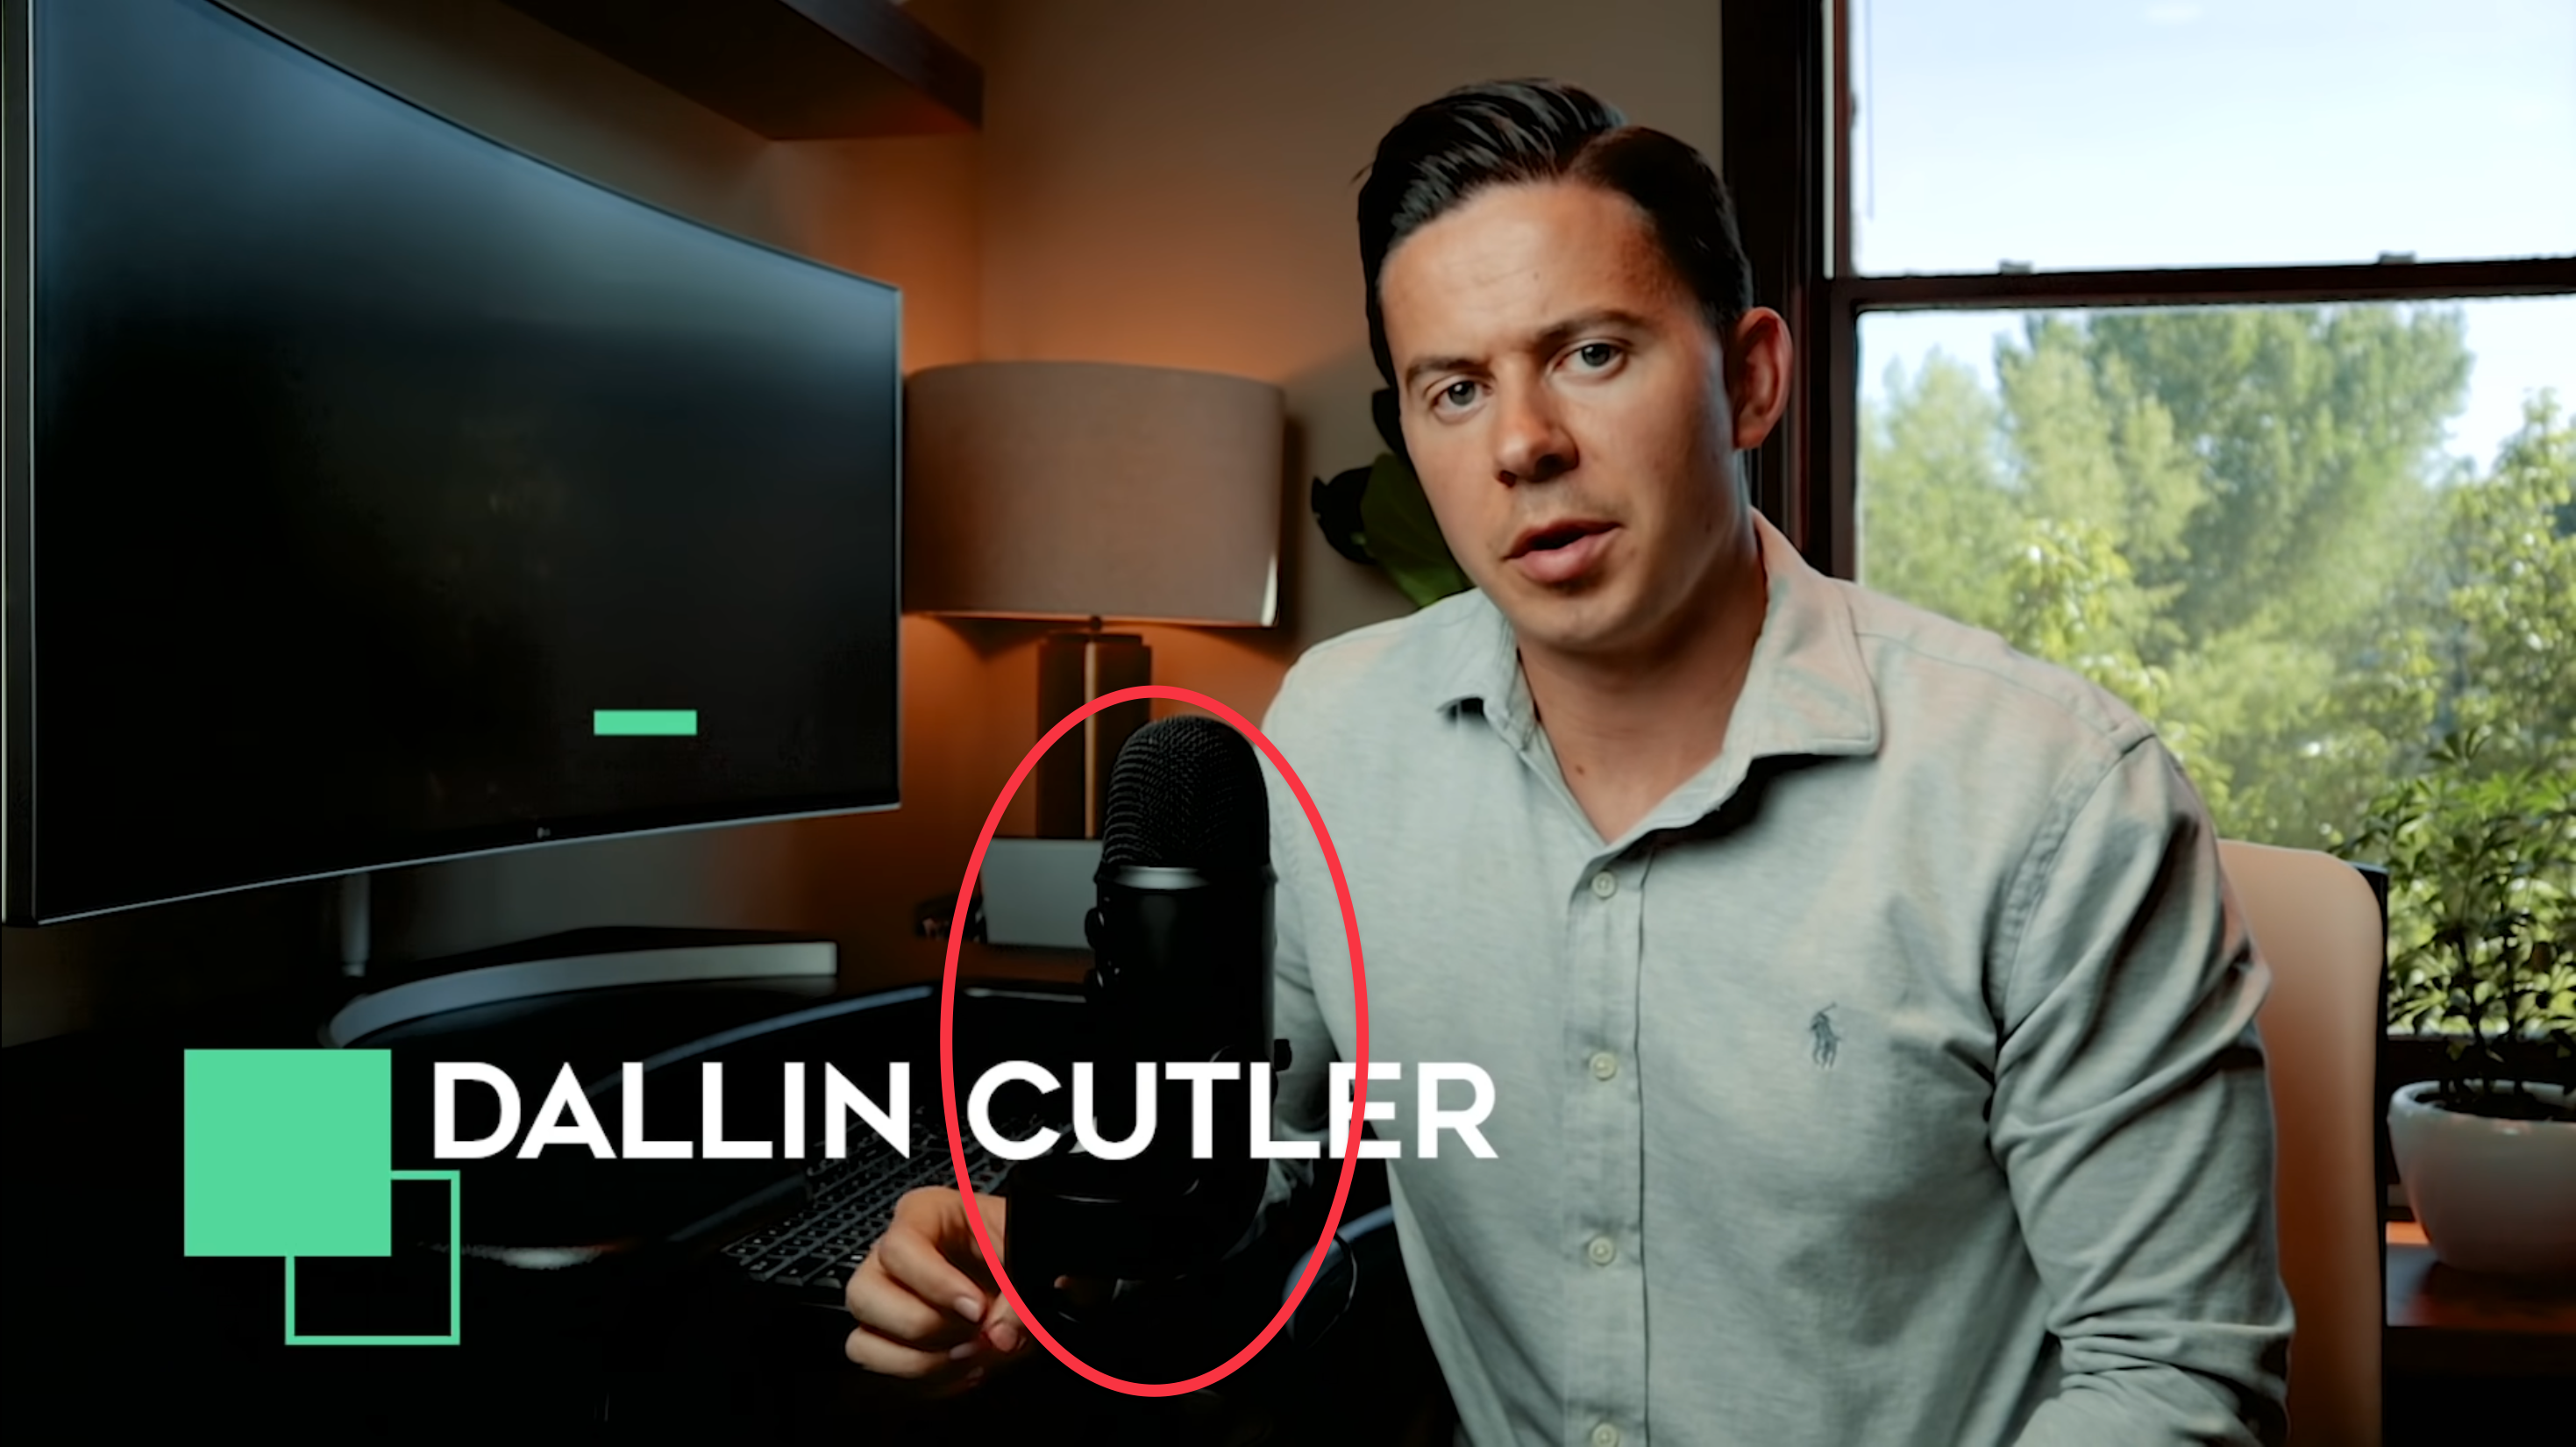
If you don’t mind that the microphone is in frame, you can find a good one that sits on your desk. The ones that connect with USB are easy if you’re using your computer or smartphone to film.
A big, soft light—slightly above, slightly to the side
A big, even light source creates soft shadows on your face. Lighting yourself with the sun is a bad idea, you’ll get “raccoon eyes.” In fact, in direct sunlight you’ll see almost all professional photos and videos taken against the light. They’ll often fill in the darkness with a big (soft) reflector.
You can definitely use natural light. A big window on the north side is a perfect natural light studio.
Placing the light source slightly above and slightly to the side mimics the position of the sun and feels natural. You need part of your face in shadows so we can perceive its shape.
Relatively bright light helps out because the background becomes relatively darker, it’s easier to focus on you that way.
Pro: 3-Point Lighting
If you want to get a more involved light setup, look into 3-point lighting—it’s the standard way of lighting and you’ll see it everywhere. It basically means:
- One strong light on the front and side (light side of the face)
- A softer, less strong light on the front and other side (dark side of the face)
- A hairlight: a sharp backlight aimed at the hair. This creates a small halo around your head and separates you more from the background
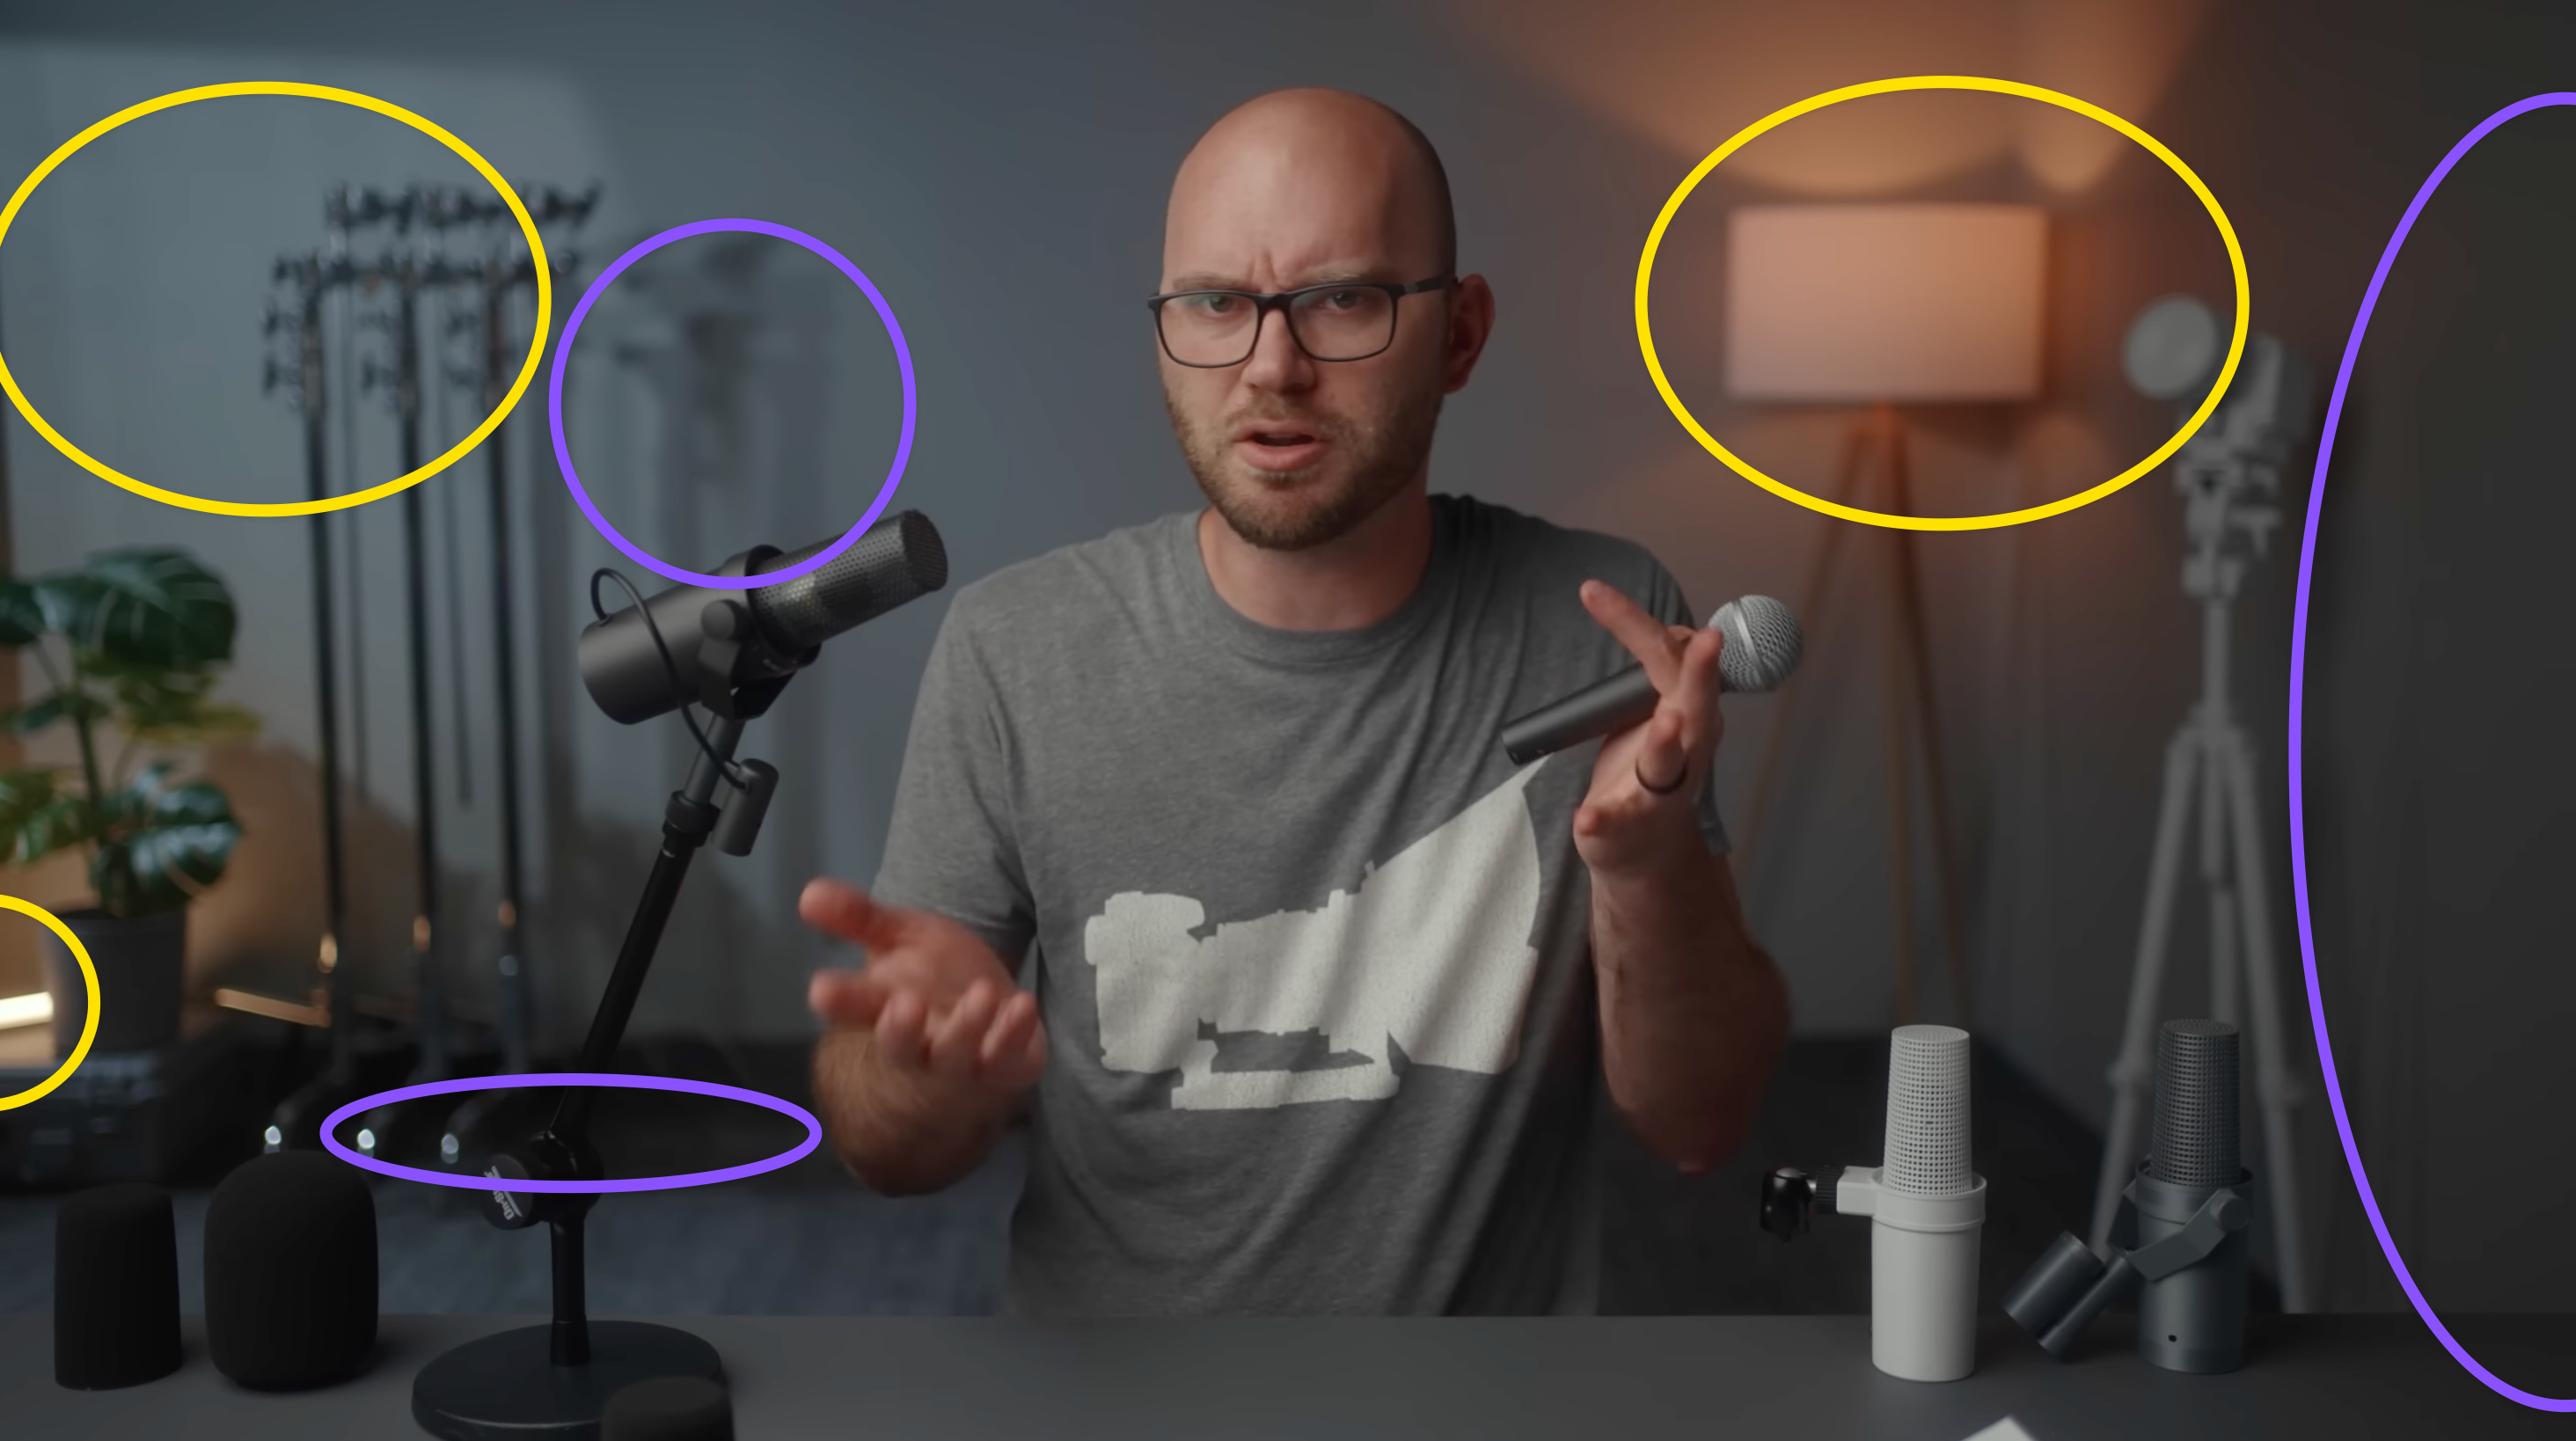
Example: Parker Wallbeck
Huge light right outside the frame on the top right. Notice how nicely shaped his face is. You can also notice the hairlight on the left in the back. He probably has a reflector in the front left to make sure his face doesn’t become too dark.
Shadow is cinematic
Okay I’m going to ruin your movie-watching experience because from now on you’ll start noticing their lighting and see that they all do the same thing. You’re welcome.
All shots are backlit. Whenever you see a face, the biggest part of that face is in darkness: they literally put black panels to block out the light.
Example
Look at how much of his face is in darkness. Ooo, cinematic.
Contrast with the shot below. Meh, doesn’t look as “good” at all.
How to use this
With the light more behind you, more of your face is dark.
This is more dramatic and looks great, but for explainer videos it might be too much.
Find a balance and don’t make the dark side too dark. Maybe fill it in with a reflector.
Salt and pepper in the background
Make your background a checkerboard of dark and light. Have it dark but sprinkle it with little lights everywhere. Make sure you don’t make them too bright, but every little light source you add will make it more interesting and will keep viewers enjoying your shot more.
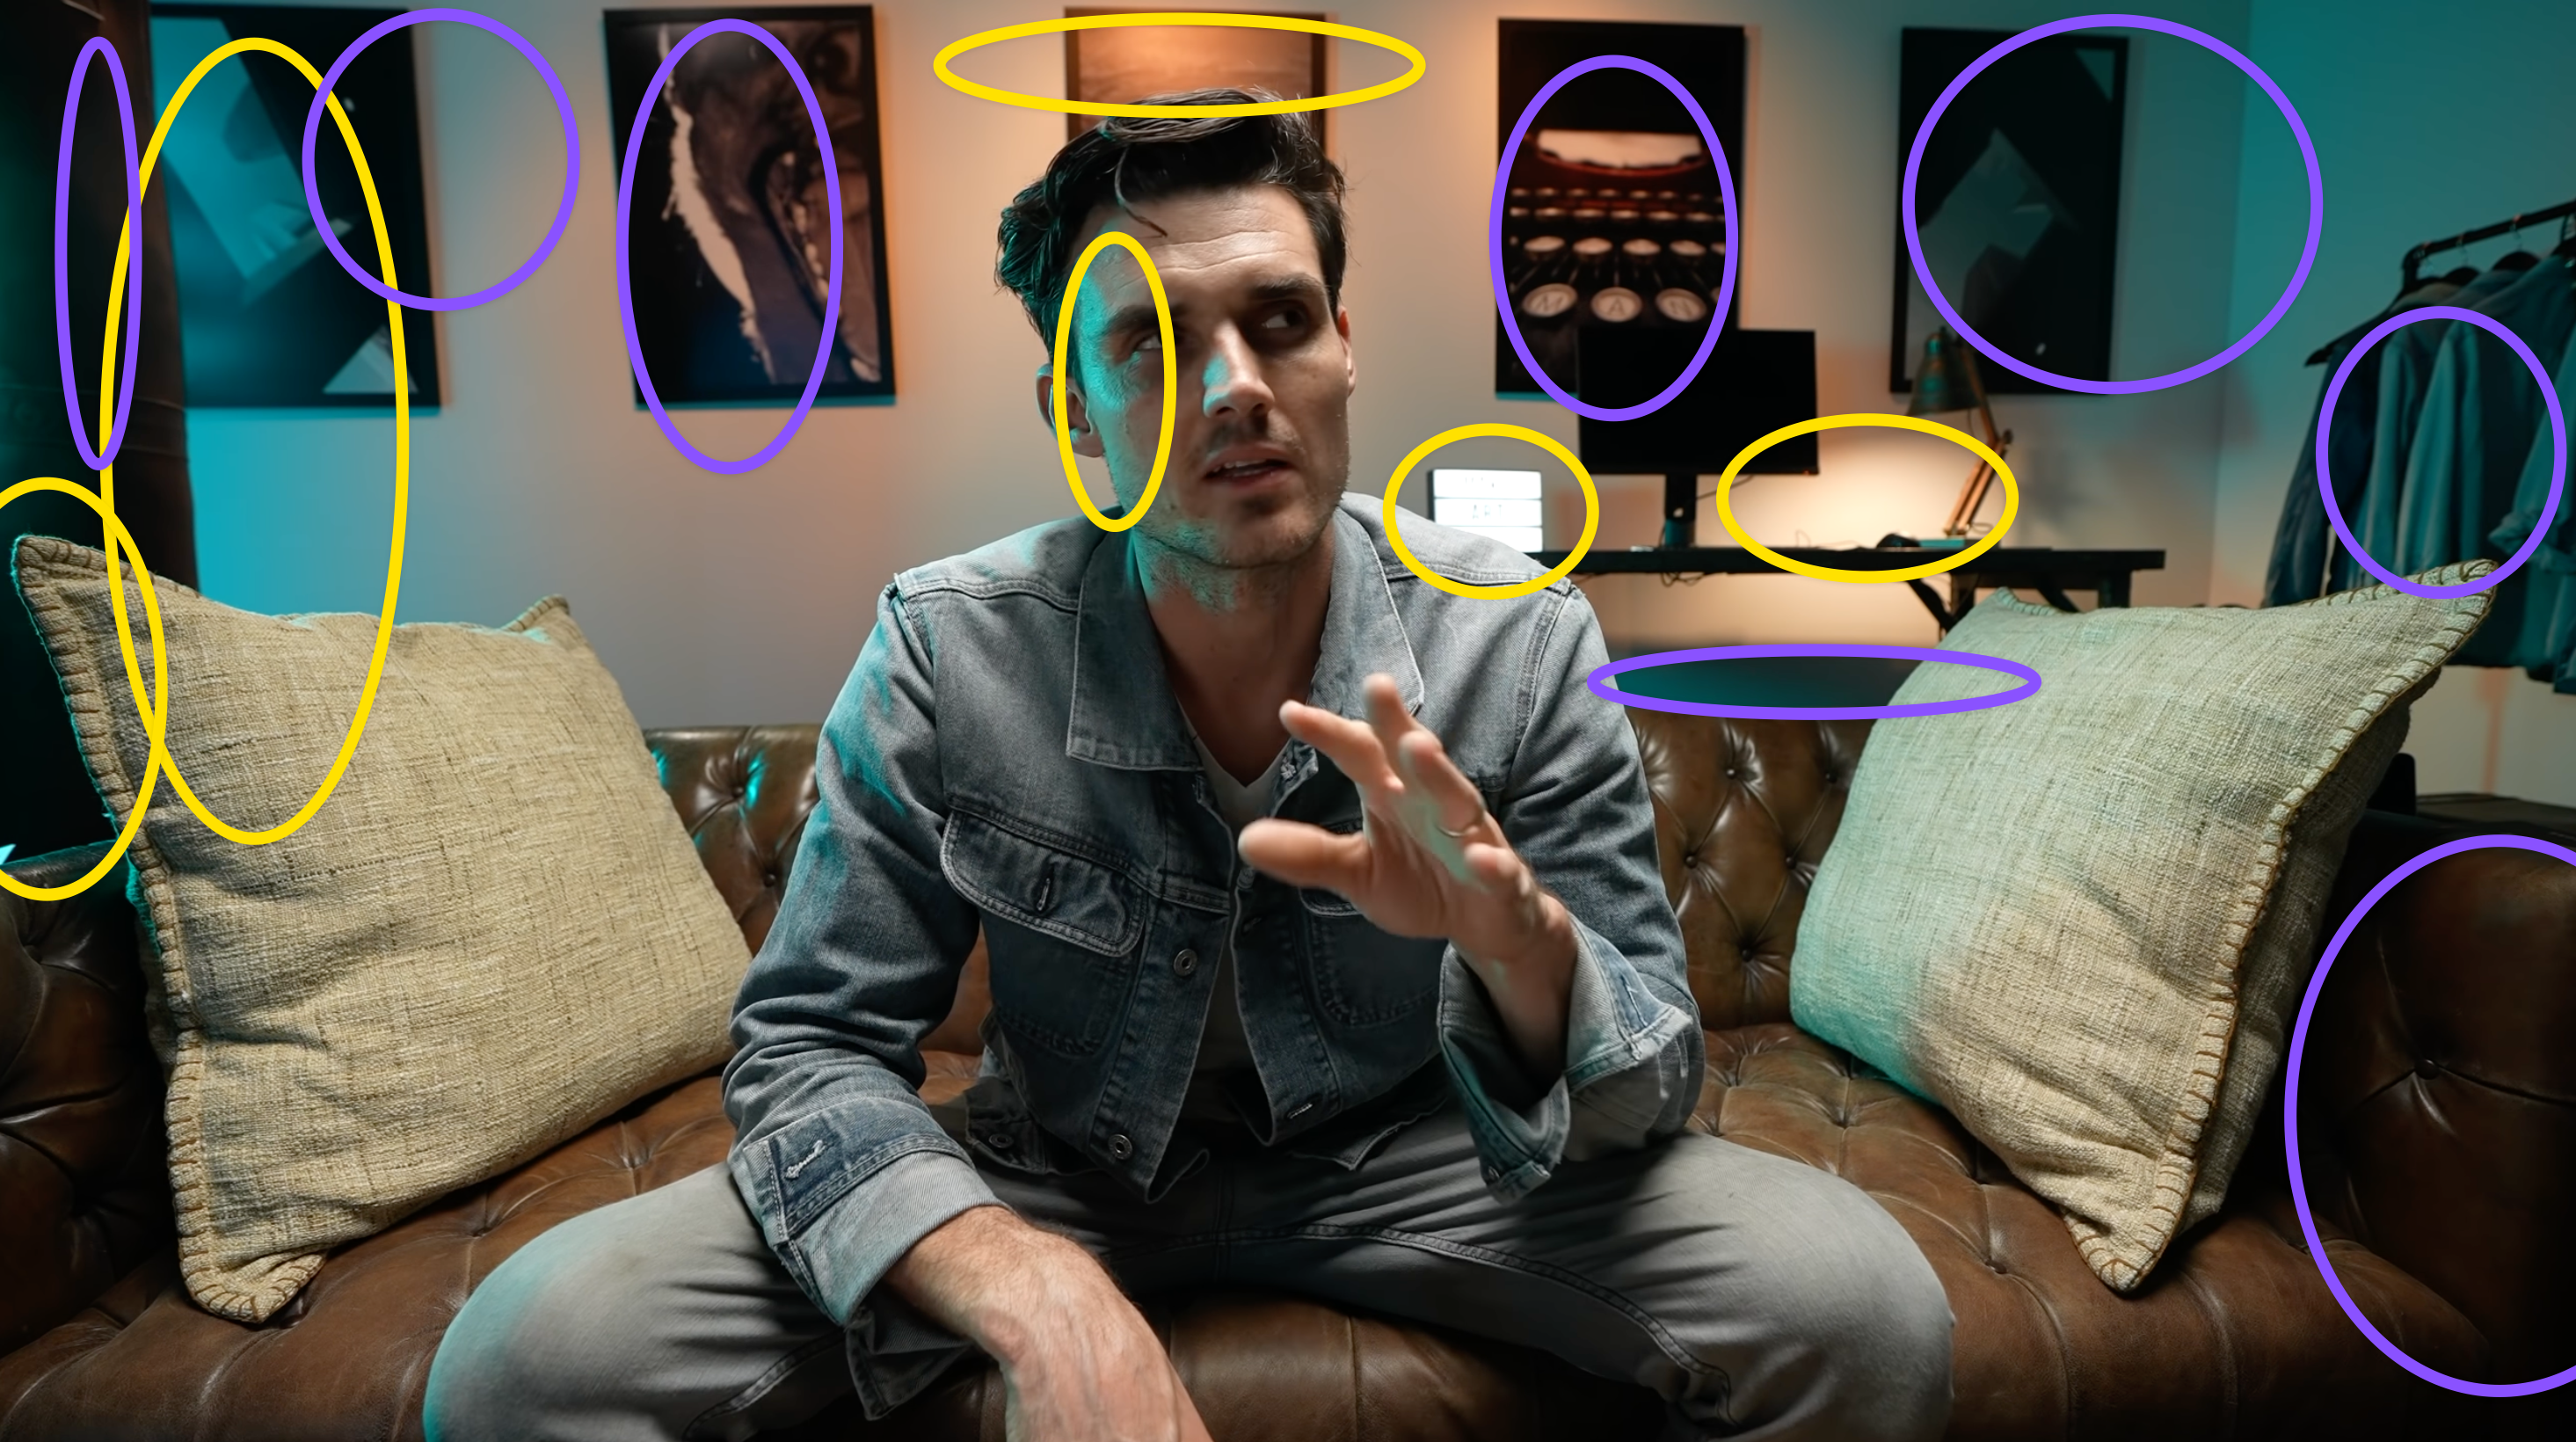
Example: DSLR Video Shooter
Salt (yellow) and pepper (purple):
Example: Make. Art. Now.
Salt and pepper, baby.
Shoot into the L of the room
We want to see depth in your shots. The most cinematic angle is where you shoot into the corner of the room. Don’t make us see a flat wall right behind you—we want to see these lines of perspective.
Framing you
The edge of the frame
Be careful with where you crop your body. There are certain points that feel good and others that feel bad. For example, if you would cut just above your wrists, it’s very weird. I prefer somewhere between just below the chest and the navel when I’m sitting down.
Rule of thirds?
In more cinematic video you’d always use the rule of thirds and put the subject slightly to the side, but for a talking head I’d frame you in the middle. This gives more authority.
Height and focal length
Place the camera close to eye level. Slightly lower makes you look more dominant which can be useful when you’re explaining.
If you can choose your lens or focal length, this is a matter of preference:
- Closer up with a wide lens feels more “intimate.” If you wave your hands a lot that will be exaggerated like this.
- Further away and zoomed in is calmer and more flattering.
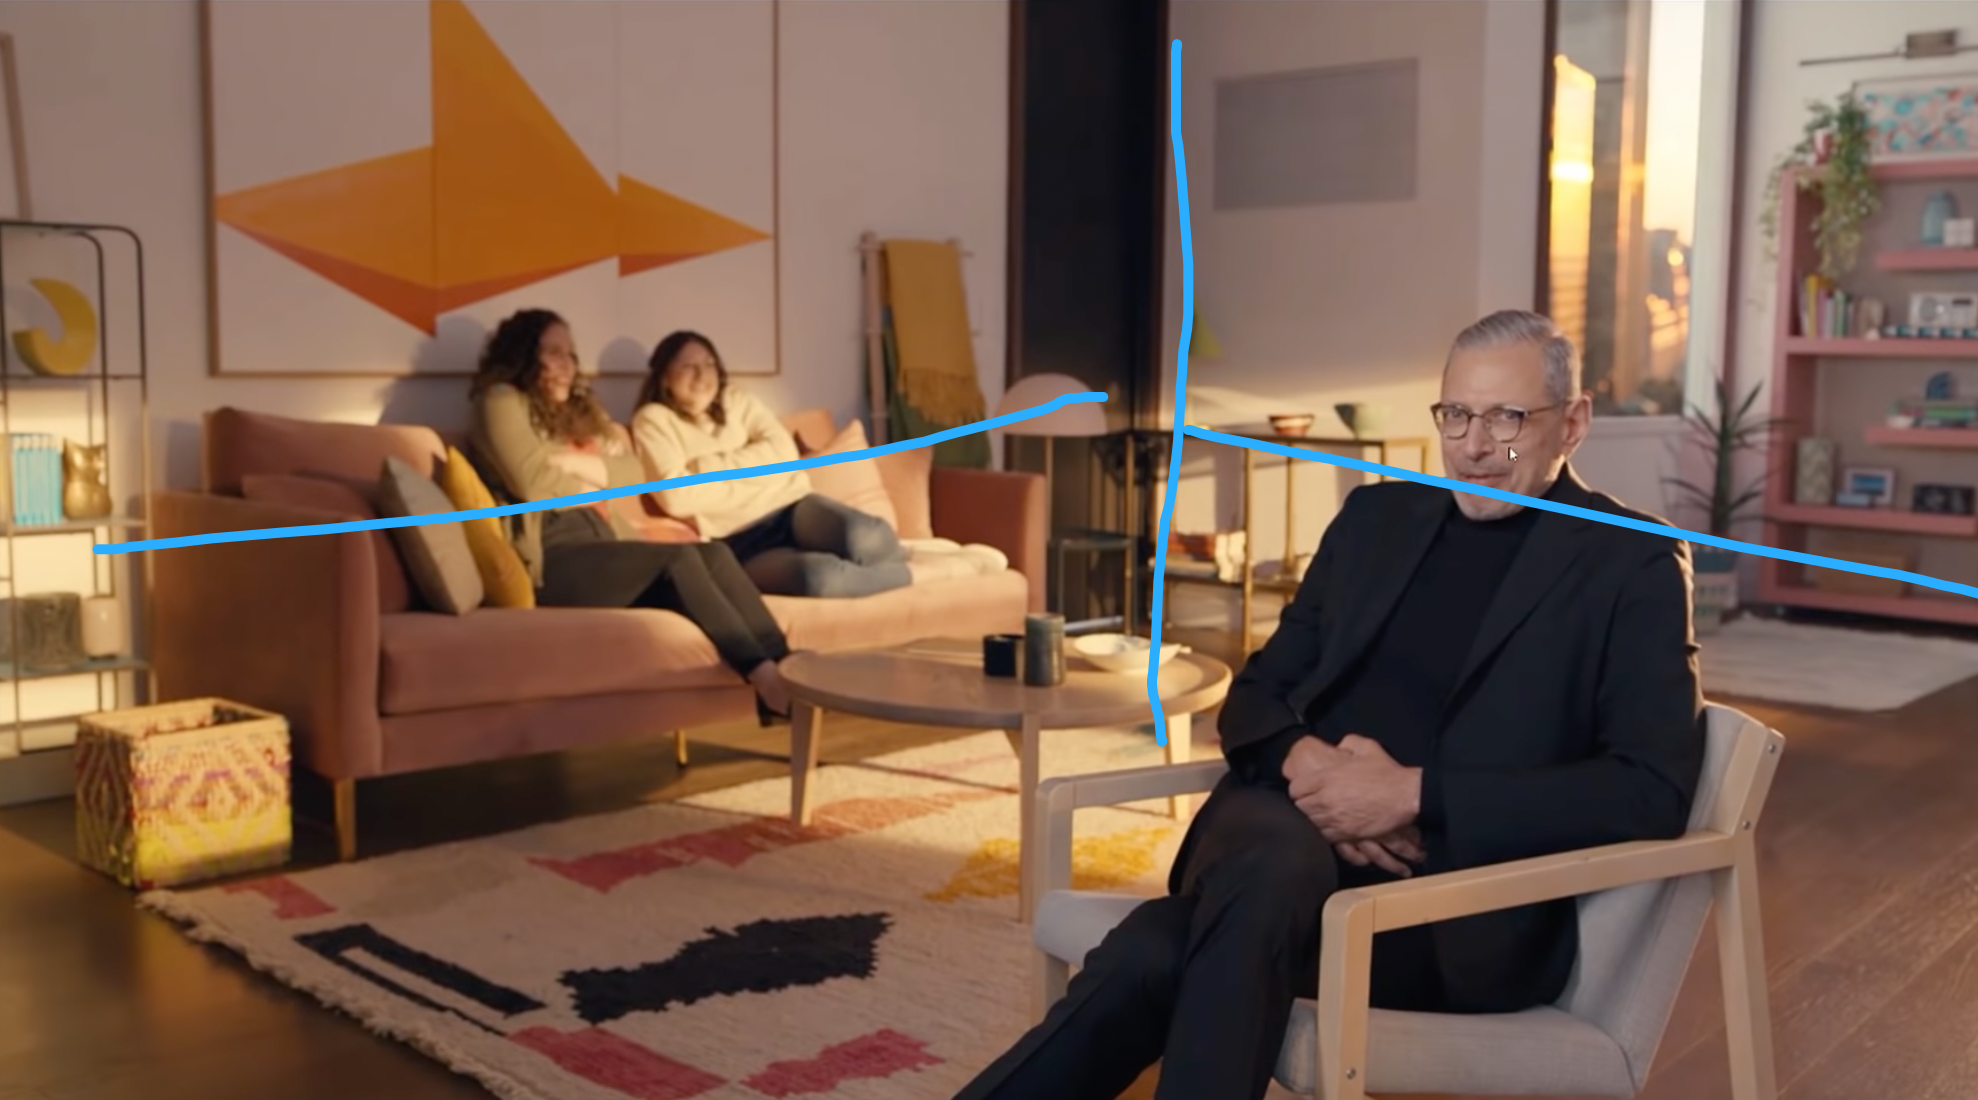
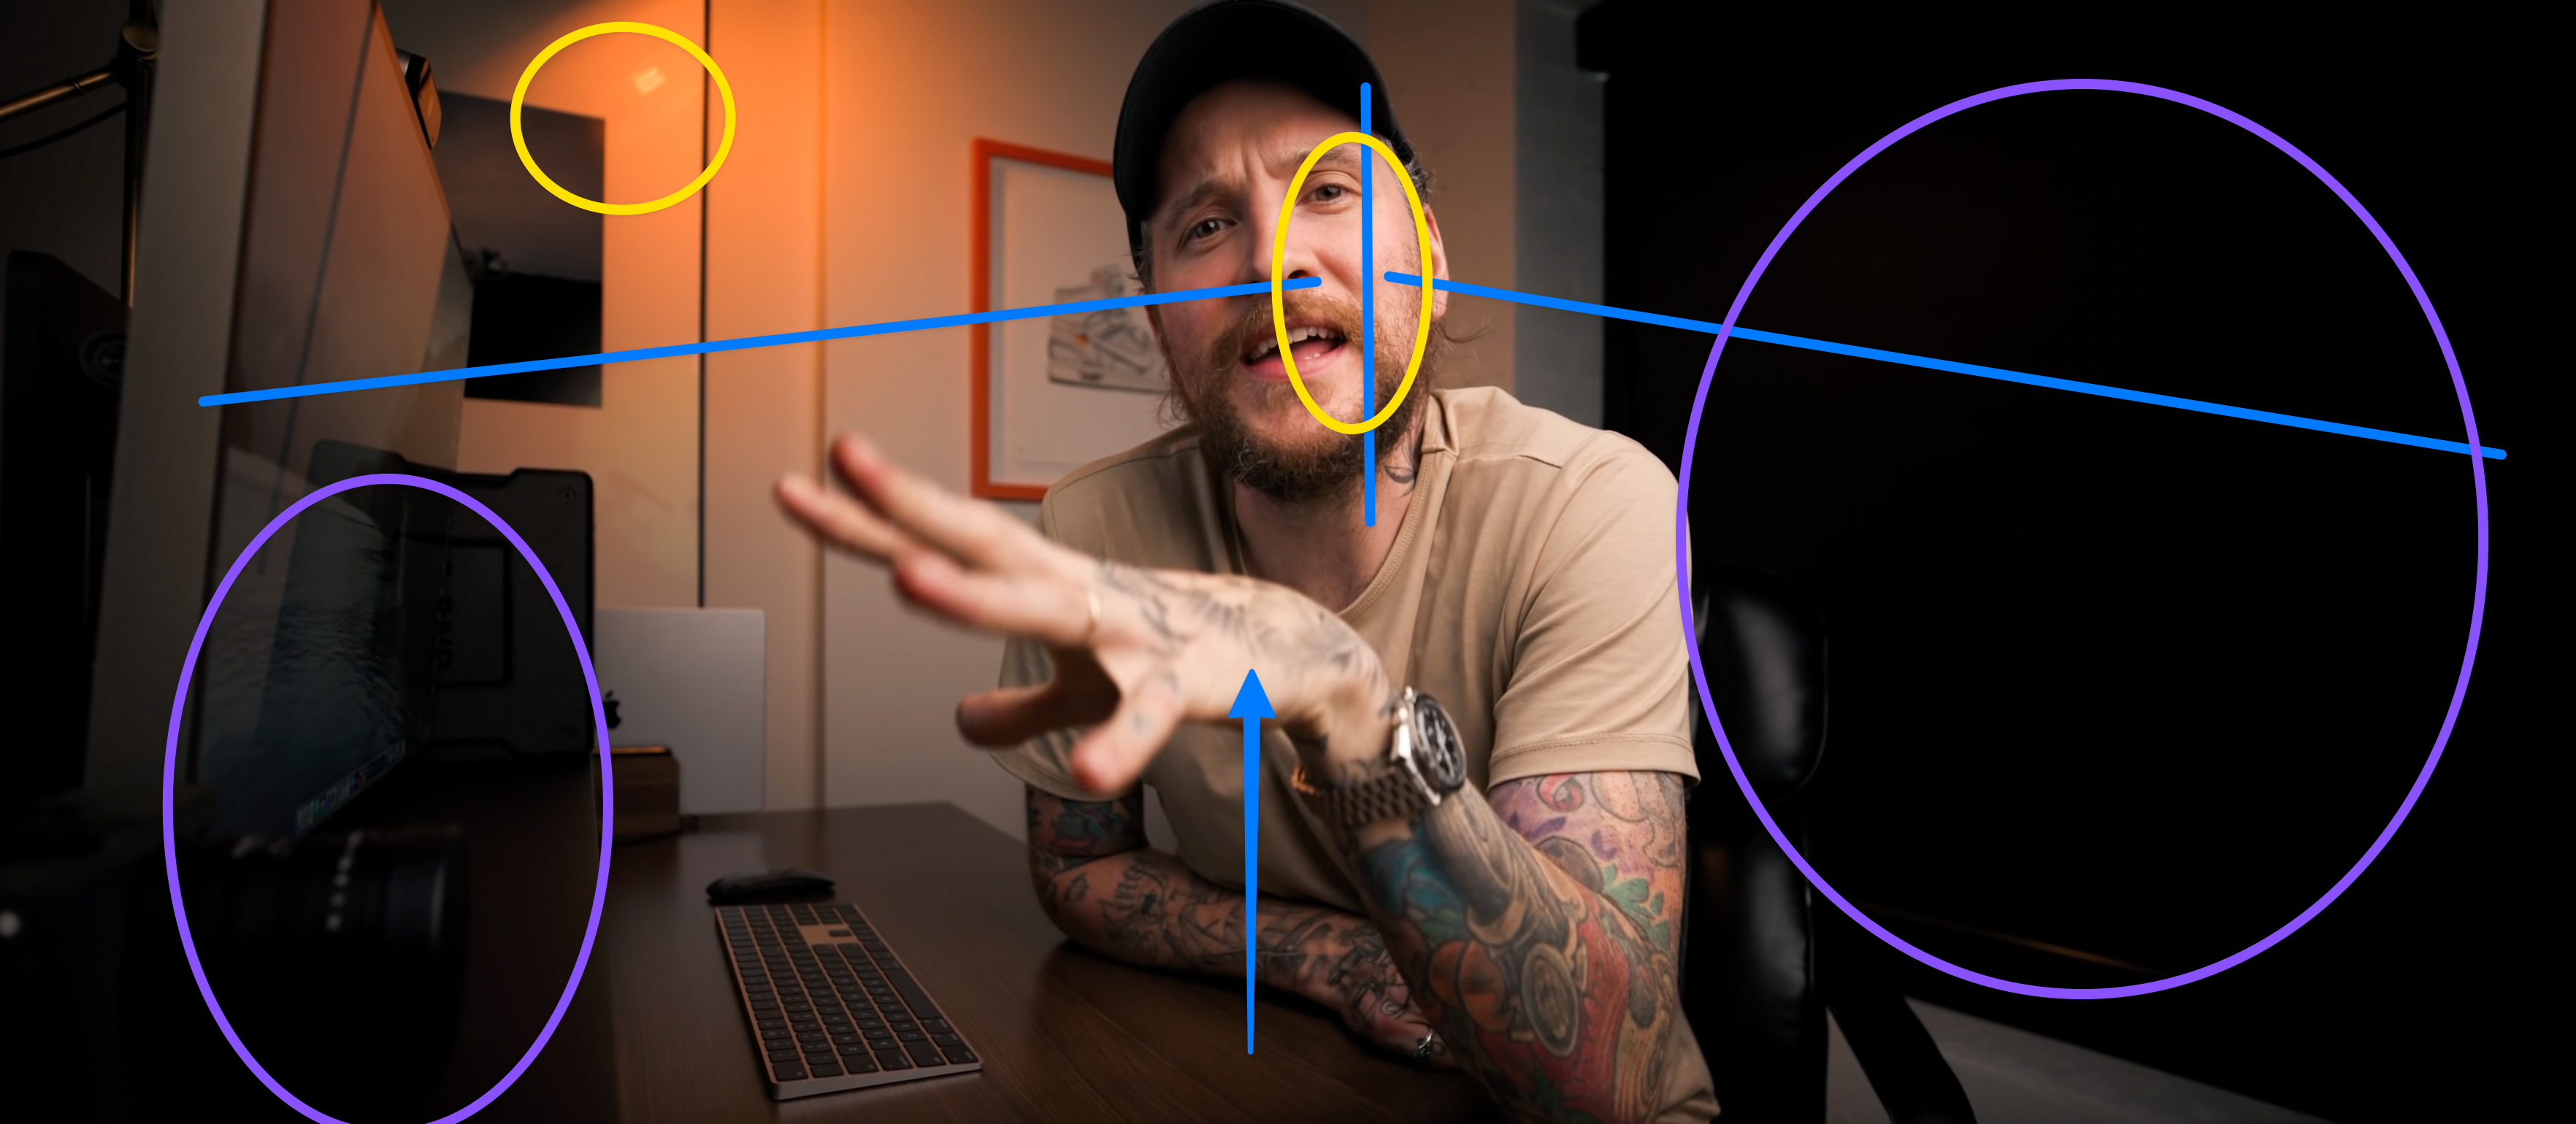
Example: Peter McKinnon
- L of the room, I can see the corner (blue)
- Wide angle, show from below (blue arrow)
- Soft light on half of his face, from right/top (yellow)
- Salt and pepper in the background: yellow light, purple black
Example: Linus Tech Tips
- Flat background
- Salt and pepper from the white and black curtains
- Bookcase makes it more interesting
- Very flat light: huge light just a little bit to the left
- This is less “interesting” but more “easy,” more sitcom
- Camera further away and zoomed in
- Natural body proportions
- You feel less “right in front of him”
Further Exploration
The Wandering DP breaks down lighting setups in beautiful shots. Watch a few videos of him and you’ll see that these principles (L of the room, backlight, face in shadow, salt and pepper) are literally applied everywhere.
Parker Wallbeck has a few great videos that introduce you to the lighting and audio setups. He has a full course too, but that goes beyond the 20%.
Video Script
Who is this for? Lukas Schmidt basically. Someone who is starting out making video, didn’t go on a research binge and just wants to put out good content.
Why should they watch this? It’s the most information-dense video out there that will drastically improve your video quality so you can keep on filming—just better.
(Filmed with most basic setup and poor framing, camera mic, no lighting etc.)
This video sucks, let’s improve it.
(Swap over to final setup. I drop in my chair.)
(Music transitions to “aww yeah” drop)
That’s more like it! Let’s learn what the most important things are that will massively increase the production quality of your tutorial or talking head videos.
We won’t be messing around, we won’t be wasting time—I’ll just tell you the 20% you need to get 80% of the way there. And I’m not going to ask you to spends thousands of euros on equipment, because the most impactful things you can do are so basic you can start implementing them today.
You ready?
Let’s dance and get into this! Breathe. This is a wild ride—strap in.
(Now show off each step in order. Film myself moving stuff around, so people see what’s happening.)
Step 1: Fix your Audio
Marcelll we were talking about video!
Look,
(Shot with shitty video and great audio.) People tolerate bad video.
(Shot with great video and shitty audio.) But they don’t tolerate bad audio.
If you’re not clear and understandable, your viewers will just leave. So let’s fix our audio.
The actual microphone doesn’t matter that much, actually. What matters more is the distance to your face.
So not use the built-in microphone of your camera, it’s just too far away. If I now just record audio with my phone separately, and keep it at about 30cm from my face, you’ll hear the quality is much better. The main reason is because your voice is now relatively much louder than the background, so you’re better isolated.
If you have issues with echo, fill the room more. Blankets on the walls, more furniture, more people—just stuff in there will absorb audio and reduce echo. If you want to hear how bad your echo is, make sure you listen in another room—because your brain cancels out the echo it’s used to hearing.
Microphones
If you want to use a dedicated microphones, there are a few options.
Like I said, your phone might get you 80% of the way there.
A lavalier microphone that you clip to your chest is a cheap option. Ones with a long wire plug in to your camera; if you want to plug it into your computer’s headphone jack you’ll need to make sure you have the right cable or an adaptor, it won’t work out of the box.
A good microphone mounted on your camera won’t help that much because of the distance.
You can also get a desk microphone that connects over USB to your computer and record like that. Just know that probably it will be visible on the video.
The pros mostly use boom microphones. They are very directional so don’t pick up sound from the side, and you mount them on a pole right above your head, pointing at your upper chest. These can get really expensive though.
Step 2: Have a big light—slightly above, slightly to the side
To light yourself, the most important factor is the size of the light source. That makes it flattering.
(Light myself with flashlight.)
If I light myself with my flashlight, even though the quality of the light is actually very good, the video looks bad.
(Light myself with window.)
A big window in your home could just be the perfect light source, like I have here. The biggest challenge with natural light though is that it constantly changes if there are clouds passing over the sun.
(Light myself with video light.)
So I use a LED panel with a diffusion panel in front of it most of the time.
To make yourself look good, actually the main factor is making sure there is shadow in your face—it is through shadow that we humans see the shape of a face.
You can go very far and light almost from behind—if most of your face is dark, this gives a very cinematic, epic dramatic look. In Hollywood movies they actually will put a black panel on the dark side of the face, to make it even darker.
Lighting more evenly it less “interesting” but also more “friendly.” So it’s up to you to find this balance.
Whatever you do, always light from above, and don’t put your light straight in front of you.
Three-point lighting
The more advanced step here is three-point lighting which is an extremely common setup. You have a main light, a softer fill light and a little sharp light that lights up your hair. This makes you stand out more from the background.
Step 3: Stand out from the background
You want you—the subject—to be separated as much as you can from the background. One of the main ways to do that is to make sure you are lighter than the background. So if you have control over your light, aim it only at you and less at the background.
Step 4: Frame well
Rule of thirds?
The most basic rule for good framing is the rule of thirds, where you don’t put your subject in the center but rather on a third of the image—horizontally and vertically.
For talking head videos like this though, I prefer just being in the middle horizontally. It shows a bit more authority and it’s only you who is the centerpiece of the video anyways. Vertically still stick to the rule of thirds.
Edge of the frame
Pay special attention to the edge of the frame. You can only cut off your body at certain parts where it looks natural. Don’t cut off ears, or below the elbow, or just above the wrists, or just below your crotch.
Distance
If you have a zoom lens, you can choose how far you’re sitting from the video.
More close-up with a wide-angle lens feels like you’re more together in the room and is a bit more informal too. Also notice how my arm movements are huge when the camera is close.
Further away is more formal, professional, and less “close.”
Shoot into the L of the room
You remember we were talking about depth? In terms of framing, it’s best that you shoot with the corner of the room behind you. That way, perspective lines are in frame, they draw your viewer in and give more depth to the video.
Step 5: Add salt and pepper
This is an idea I got from the Wandering DP. He has a great channel with breakdowns of beautiful cinematic shots. If you want to learn more, watch a few of his videos and you’ll see the same things return over and over again.
Salt and pepper is about making the background more interesting—and the way you do that is by making dark and light alternate as much as possible. So add little tiny lights everywhere, basically. It’s just nicer to look at.
Wrap-up
Those are, really quickly, the core elements of good-looking video. If I had to pick the 20% of the 20%, I’d say:
- Make sure your audio is good
- Frame yourself comfortably so no weird cutting off
- Light from above and to the side
Watch this video again and write down for you what your next 3 steps will be in improving your video quality. Try it out today if you can! I really want to encourage you to do this, because if you’re still watching it means you’re interested in this stuff. Give me a comment and link to a video if you’ve used these techniques!
And please leave feedback, because it helps YouTube to show you videos you like, it helps me because more people will see this and I hope to see you in the next one. Thank you for watching, it means a lot to me. Really.
Meta
GPT-3 Title, Thumbnail and description input
- 3 Tips to Make Your Videos Look More Professional
- How to Make Your Videos Look Better Instantly
- Make Your Videos Look More Professional in 3 Easy Steps
Thumbnail: a person in front of a laptop with the text “5 Tips To Make Your Videos Look Professional”.
The description under the video says: “If you’re new to making videos, you might not know all the tips and tricks to make your videos look more professional. In this video, we show you 5 easy tips that will make a big difference in the quality of your videos.”